
Guide for Developers (Jupyter & Git)#
Welcome! If you are contributing Python/R code, spatial analyses, or interactive maps, you will be working directly with Jupyter Notebooks (.ipynb).
1. Setting up your Computing Environment#
You can run our notebooks entirely in your browser without installing anything locally. Click the 🚀 icon in the top menu bar of any notebook page and choose your preferred environment:
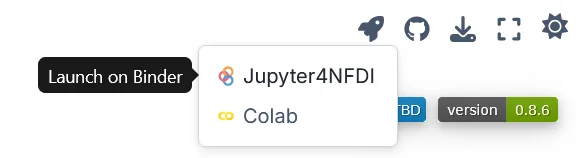
Fig. 8 Go the Start Page and select your Launch Option in the top browser bar.#
Option A: Jupyter4NFDI#
Recommended
Best for German institutions or users with existing ORCID/Google accounts.
Select Jupyter4NFDI from the 🚀 menu.
Authenticate via the Helmholtz AAI (Tip: You can use your ORCID or Google account if you don’t have an institutional login).
The environment loads with JupyterLab, Git, and all packages pre-installed.
Option B: Google Colab#
Best for international users preferring a quick Google login.
Select Colab from the 🚀 menu.
Our notebooks contain a setup cell that automatically syncs the repository, data paths, and installs required packages on the fly. Both platforms function identically!
(Prefer working locally? Use our Carto-Lab Docker or clone the repo using your own Jupyter environment).
2. How to Submit Your Work#
Choose the method that works best for you:
Method 1: Download & Drop#
No Git Required
Work in your cloud environment until you are happy with your notebook.
Download the
.ipynbfile to your computer.Upload it to our File Drop Folder.
Email
fdz@ioer.deso we can integrate it into the book!
Method 2: Git Workflow#
Fork the HaCLAthon GitHub Repository.
Develop your
.ipynbnotebook.Colab Users: You can directly use
File -> Save a copy in GitHubto push to your fork.JupyterLab Users: Ensure Jupytext has synced your
.mdfile before committing.
Open a Pull Request against our
mainbranch.
Have a look at our developer notes for working with git.
3. Integrating External Web-Maps#
If you have built a custom map (e.g., MapLibre/Leaflet) or standalone dashboard, you can embed it without script conflicts:
Save your map as an HTML file (e.g.,
storymap.html).Upload it alongside your notebook.
Display it seamlessly inside the book using an
IFrame:
from IPython.display import IFrame
IFrame(src="./storymap.html", width="100%", height="700px")