
Developers#
This page explains the underlying toolset, rules, and style conventions for our Jupyter Book collaboration.
We are open to contributions in any format and will harmonize these after submission. However, if you are familiar with Jupyter, you can submit your contributions directly in the .ipynb / .md format following the conventions outlined here.
This project is a collaborative team effort. This page provides a walkthrough for developing, reviewing, and contributing to the IOER Conference 2026 HaCLAthon.
 Made with ❤️, Collaboration, and Open Source Software. Picture: 2021 Alexander Dunkel
Table of Contents
1. Overview of files#
All documents are edited as Jupyter notebooks (paired with Markdown via Jupytext) in the subfolder notebooks/ and md/:
00_quickstart.md: The general onboarding guide for participants.200_community_index.md: The live index and notice board of accepted hacks.201_digital_landscape_traces.md: Example chapter demonstrating the data story format.references.bib: Central BibTeX bibliography file._toc.yml: Table of Contents defining the Jupyter Book chapter structure.
2. Publishing & Multi-Remote Sync Process#
The HaCLAthon infrastructure connects GitHub (public community hub for issues, PRs, and Decap CMS edits) with GitLab (internal CI/CD build engine, semantic release, and web hosting):
Production Site (Public): https://hack.conference.ioer.info (GitLab branch
main)Staging Site (Internal): https://stag.hack.conference.ioer.info/ (GitLab branch
staging)

2.1 The GitHub ↔ GitLab Workflow#
Community Submissions: Contributors submit drafts on GitHub against the
stagingbranch (either via git or the visual browser editor).Review & Audit: Maintainers inspect incoming changes locally on a review branch, verify Jupytext syncing, check links, and ensure formatting standards.
CI/CD Build: Changes are merged into local
mainand pushed to GitLab (origin main). The GitLab pipeline builds the static HTML, bumps the semantic version, and updates the production server.Mirroring: GitLab mirrors
mainback to GitHub, ensuring full transparency.
2.2 Maintainer Runbook: Integrating External Submissions#
2.2.1 Integrating Direct GitHub Contributions#
When integrating a contribution from GitHub’s staging into main, preserve author attribution (so the contributor is recognized as the author in git history and GitHub graphs) by following these steps:
Step 1: Fetch all remotes
git fetch origin
git fetch github
git checkout main
git pull origin main
Step 2: Inspect incoming commits
Create a temporary inspection branch tracking GitHub’s staging:
git checkout -b review-incoming github/staging
git log --oneline main..HEAD
Step 3: Cherry-pick the contributor’s commits onto a clean branch
Rather than merging a potentially outdated staging branch, create a fresh branch from main and cherry-pick only the contributor’s commits:
git checkout main
git checkout -b feature/contribution-name
git cherry-pick <COMMIT_HASH_1> <COMMIT_HASH_2>
Note
git cherry-pick preserves the original Author metadata automatically.*
Step 4: Resolve conflicts & verify formatting
Verify
_toc.ymlandreferences.bib.Ensure Jupytext sync is run if
.mdwas added:jupytext --sync md/<chapter>.md.Check that relative image paths point to
resources/.
Step 5: Merge into main and push to GitLab
git checkout main
git merge --no-ff feature/contribution-name -m "feat(community): add chapter by <Author Name>"
git push origin main
2.2.2 Integrating External GitHub Pull Requests (PRs)#
When a contributor submits a contribution via a GitHub Pull Request (e.g., via the Decap CMS or a fork), use this workflow to fetch the PR locally, test it, and merge it with full author attribution (preserving the purple “Merged” status on GitHub):
# 1. Fetch the PR into a local review branch (replace '4' with the PR number)
git fetch github pull/4/head:pr-4

# 2. Inspect the incoming changes
git checkout pr-4
git log -1 --stat
git diff main..HEAD

# 3. Switch to main and merge with a merge commit (preserves Author and commit graph)
git checkout main
git pull origin main
git merge --no-ff pr-4 -m "feat(community): merge PR #4 by @contributor_username"

# 4. Push to GitLab (deploys website & bumps semantic release)
git push origin main

# 5. Push to GitHub (automatically marks the PR as Merged/Purple on GitHub!)
git push github main

# 6. Fast-forward GitHub staging to the latest main
git push --force-with-lease github main:staging

# 7. Clean up local review branch
git branch -D pr-4
2.3 Syncing the GitHub Staging Branch#
After merging to main and verifying the CI/CD pipeline, bring GitHub’s staging branch up to date with main so subsequent contributors work from the latest baseline:
git push --force-with-lease github main:staging
Note
Because all cherry-picked/merged commits are preserved in main, this cleanly fast-forwards staging without overwriting or deleting any author history.
3. Editing files#
Depending on your comfort level with Git, choose one of the following paths:
JupyterLab Git Extension: Use collaborative JupyterLab instances and follow Section 4: Jupyter Collaborative Editing.
Web Browser CMS: Edit text directly via Decap CMS (see Guide for Writers).
Local Git Clone: Clone the repository locally and edit
.ipynb/.mdfiles directly.
4. Jupyter Collaborative Editing#
Join a collaborative Jupyter session in your browser.
4.1 Start with editing a Jupyter notebook#
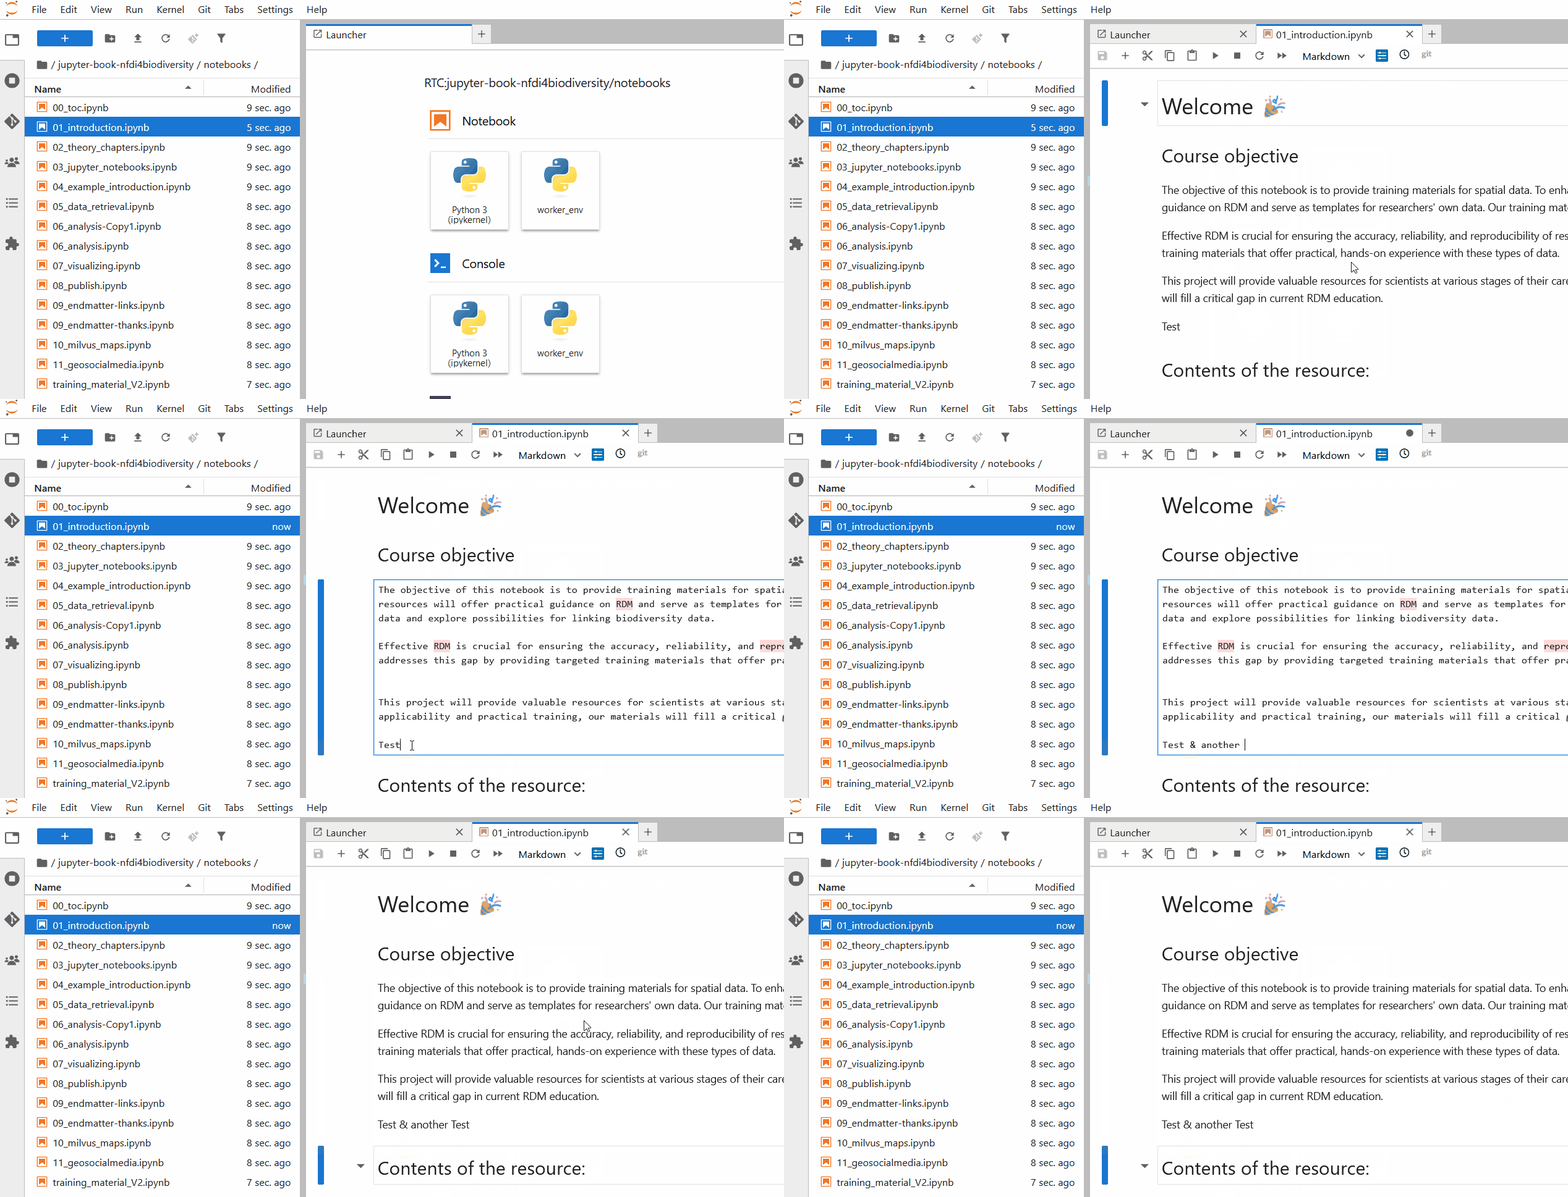
Fig. 13 Start with editing a Jupyter notebook.#
Save changes to the notebook file with Ctrl+S.
4.2 Open the Jupyter git extension#
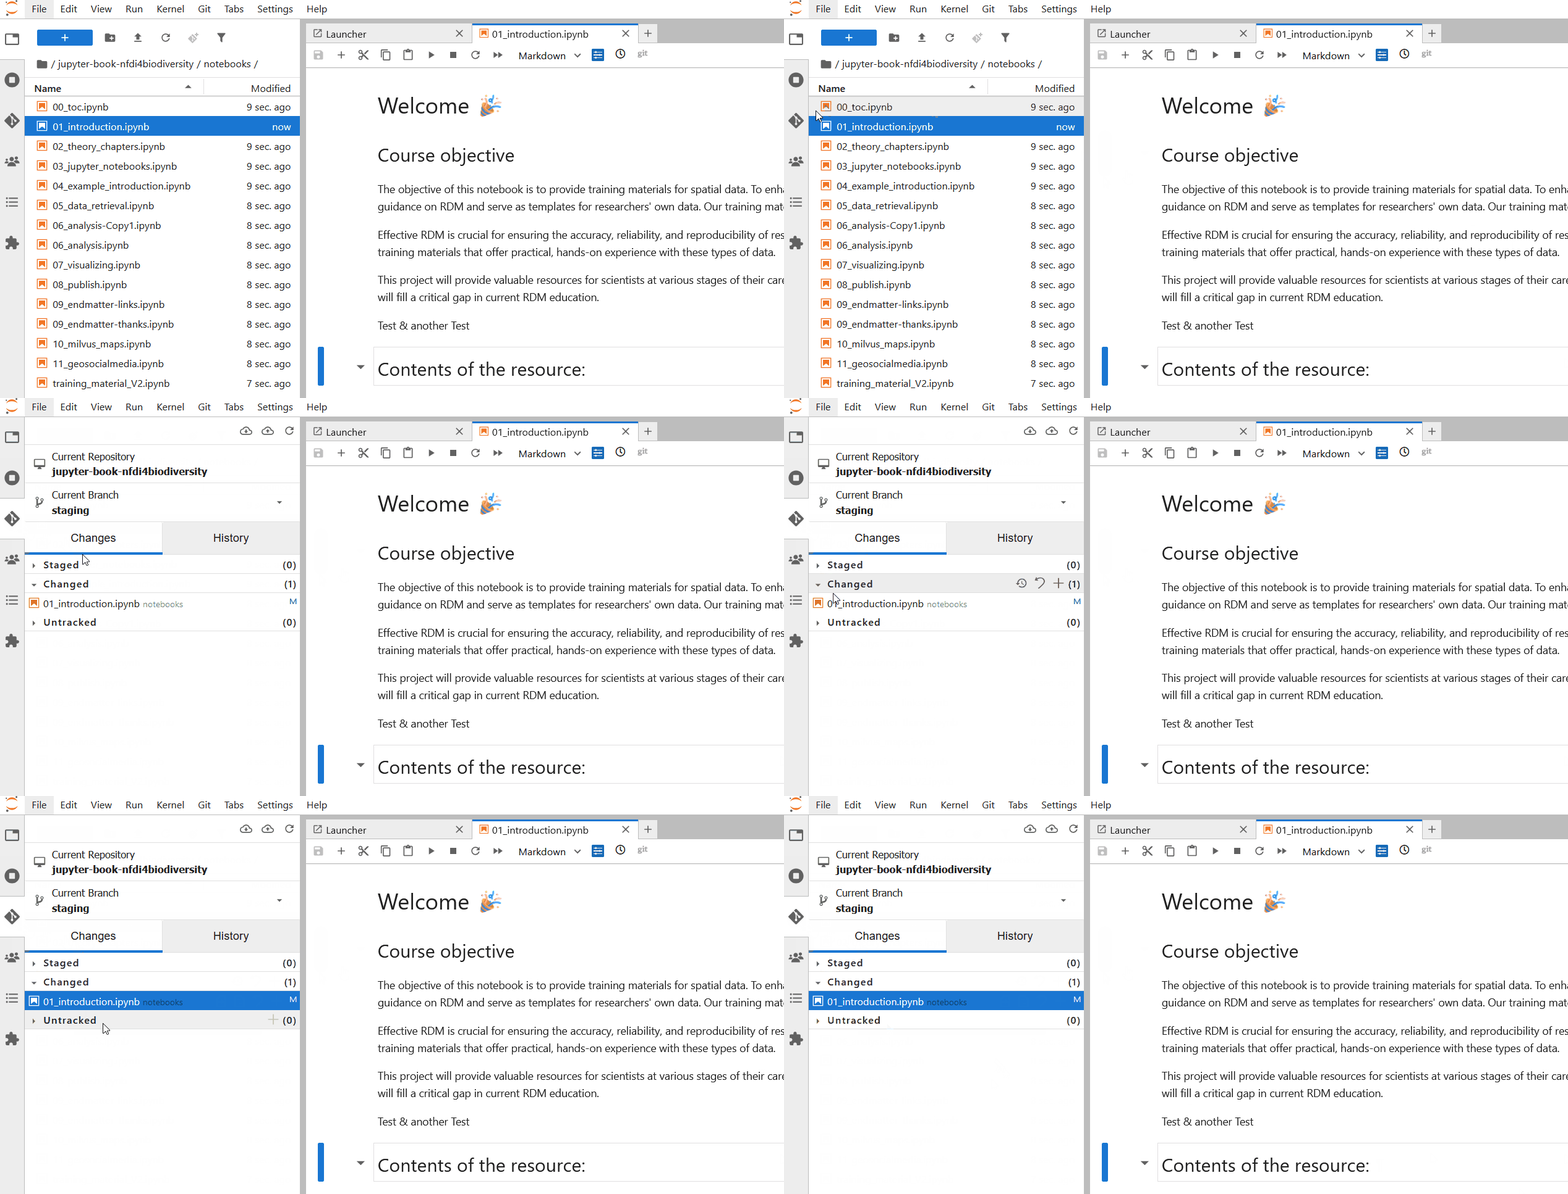
Fig. 14 Find the JupyterLab Git extension in the left sidebar.#
4.3 Commit changes#
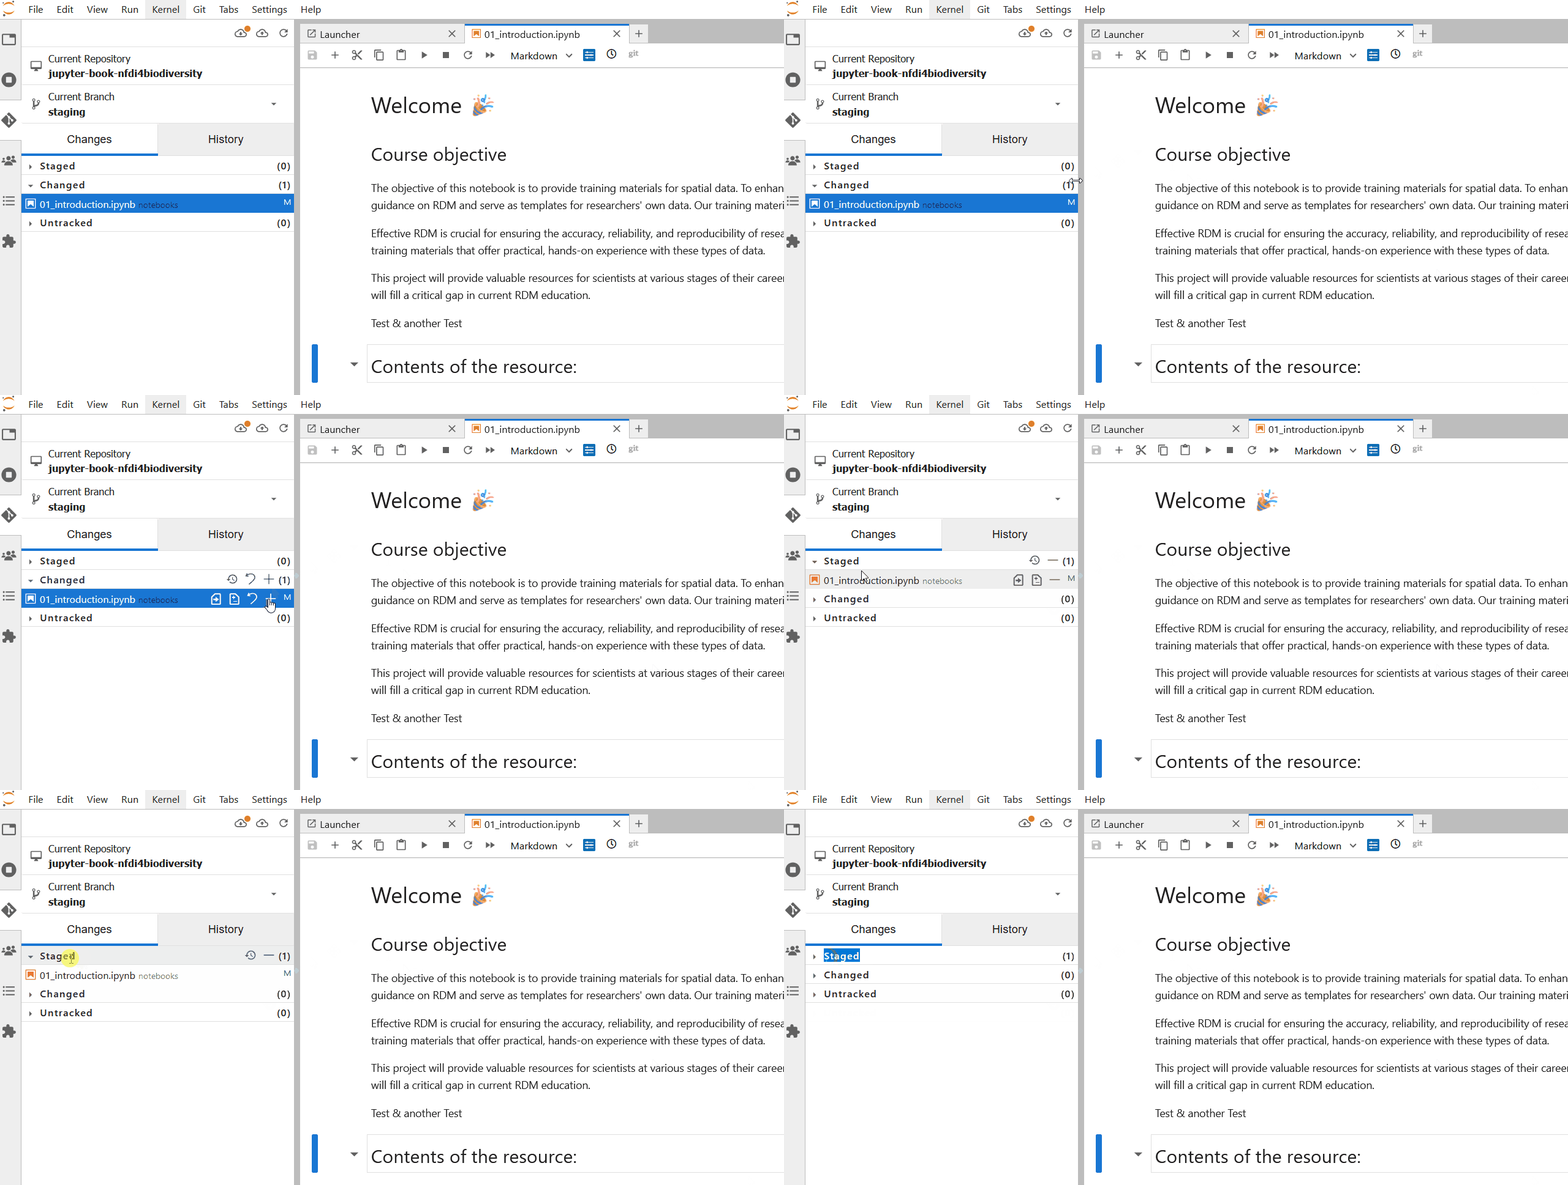
Fig. 15 Stage changed files by clicking the + icon.#
4.4 Write a commit message#
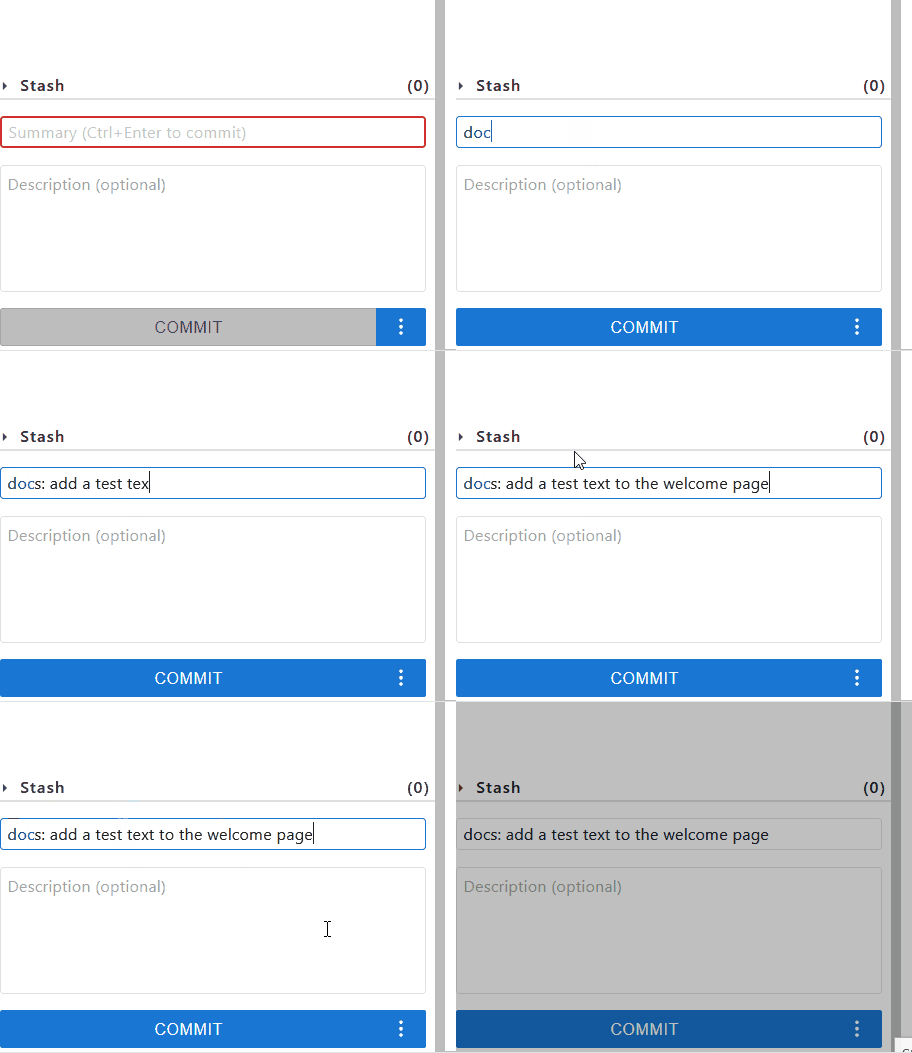
Fig. 16 Write a short, descriptive commit message following Conventional Commits, then click Commit.#
4.5 Push changes to remote#
If an orange dot appears next to the pull icon, click to pull changes first:
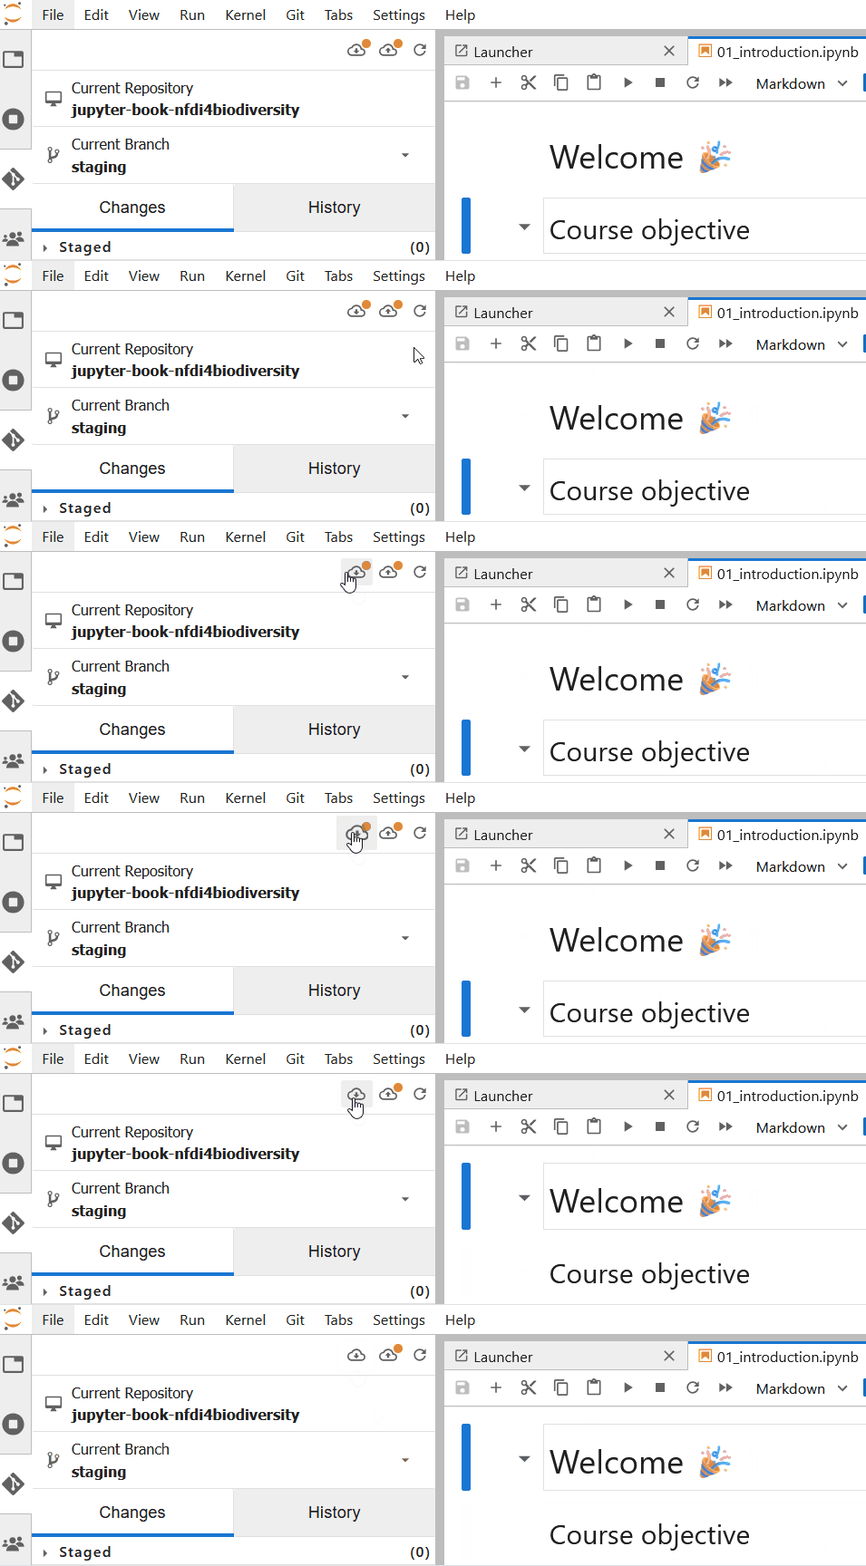
Fig. 17 Click on “Pull changes from remote”.#
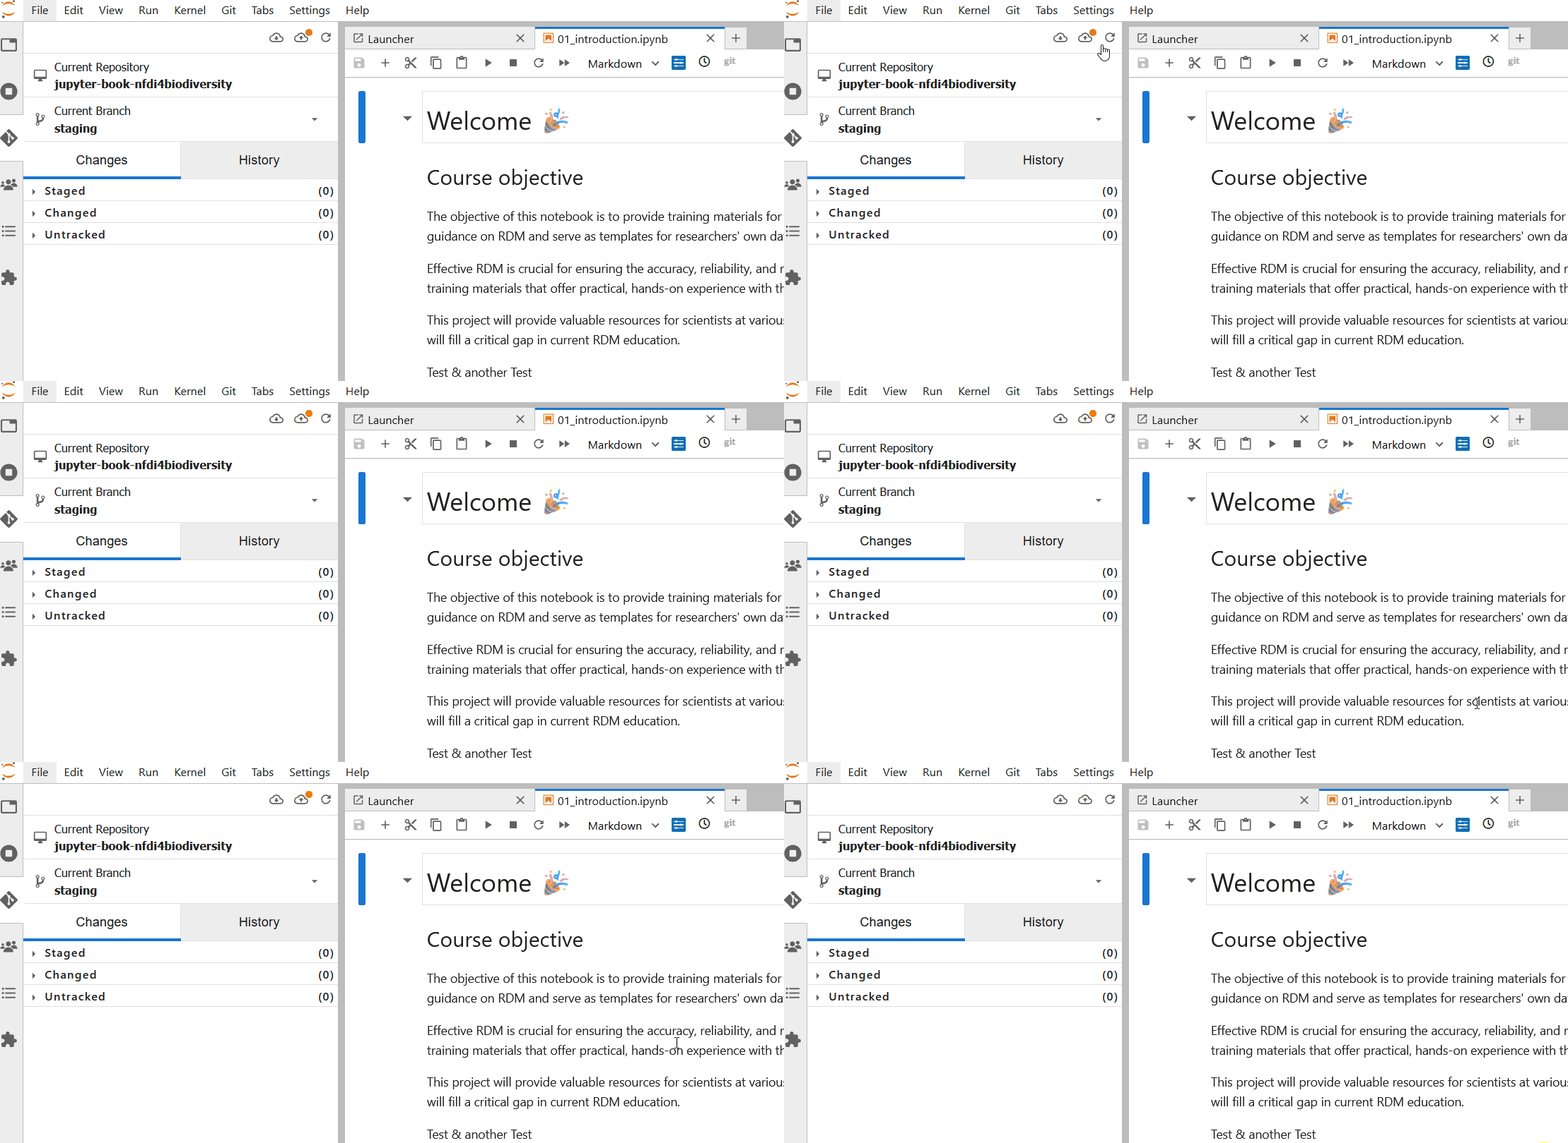
Fig. 18 Click on “Push changes to remote”.#
4.6 Wait for the website to update#
Check the GitLab CI Pipelines and wait 1–2 minutes until the pipeline completes.

Fig. 19 A passed pipeline with green checkmarks.#
5. Git best practices#
Commit often: Commit and push after every distinct change to back up your work.
Pull before you start: Always pull the latest changes from remote before editing.
Temporary workspaces: Store intermediate experiments under
tmp/. Files intmp/are ignored by Git.
6. Semantic Versioning#
The book is automatically versioned using python-semantic-release adhering to Semantic Versioning (MAJOR.MINOR.PATCH).
Please write commit messages following the Conventional Commits Specification:
Commit Type |
Purpose |
Release Effect |
|---|---|---|
|
Descriptions, chapter text, fixing typos |
Listed under Documentation |
|
Minor code bug fixes |
Triggers PATCH bump ( |
|
New chapters, major code features |
Triggers MINOR bump ( |
|
Pipeline and build config changes |
Listed under Continuous Integration |
|
Code restructuring without feature changes |
No version bump |
7. Formatting conventions#
Concise sentences: Aim for 10–15 words per sentence.
Figures: Use
.webpfor raster graphics and.svgfor diagrams.Language: Use American English throughout the documentation.
Figure and Table formatting#
```{figure} ../resources/data-processing.webp
:name: data-processing
:figclass: fig-no-shadow

Data Processing Workflow.
```
See the Jupyter Book docs on how to create Figures and Tables with caption.
There is a box-shadow effect shown around figures by default. If you want to disable this on selected graphics, add :figclass: fig-no-shadow to the {figure}-tag.
Like so
```{figure} ../resources/data-processing.png
:name: gbif-graphic
:figclass: fig-no-shadow

GBIF Data Processing Documentation
```
Cross-references#
Always define explicit anchors to avoid breaking internal links when headings change:
(content:myanchor)=
## My Section Title

Link back using: [My Section Title](content:myanchor)
See the docs
Admonitions (Callouts)#
Use MyST admonitions to structure information:
```{admonition} Important Note
:class: note
This is a standard callout.
```
Important Note
This is a standard callout.
```{admonition} Try it yourself!
:class: dropdown, attention
This creates a collapsible orange action box.
```
Try it yourself!
This creates a collapsible orange action box.
8. Citations and References#
Citations are managed using sphinxcontrib-bibtex.
Add BibTeX entry: Add the citation to
references.bibin the root folder.Use in text:
Parenthetical:
{cite:p}\(\rightarrow\)(Dunkel et al., 2025)Inline text:
{cite:t}\(\rightarrow\)Dunkel et al. (2025)Author-only:
{cite:alp}\(\rightarrow\)Dunkel et al. 2025
Chapter bibliography: Add the following block to the end of your notebook:
## References

```{bibliography}
:style: unsrt
:filter: docname in docnames
```